
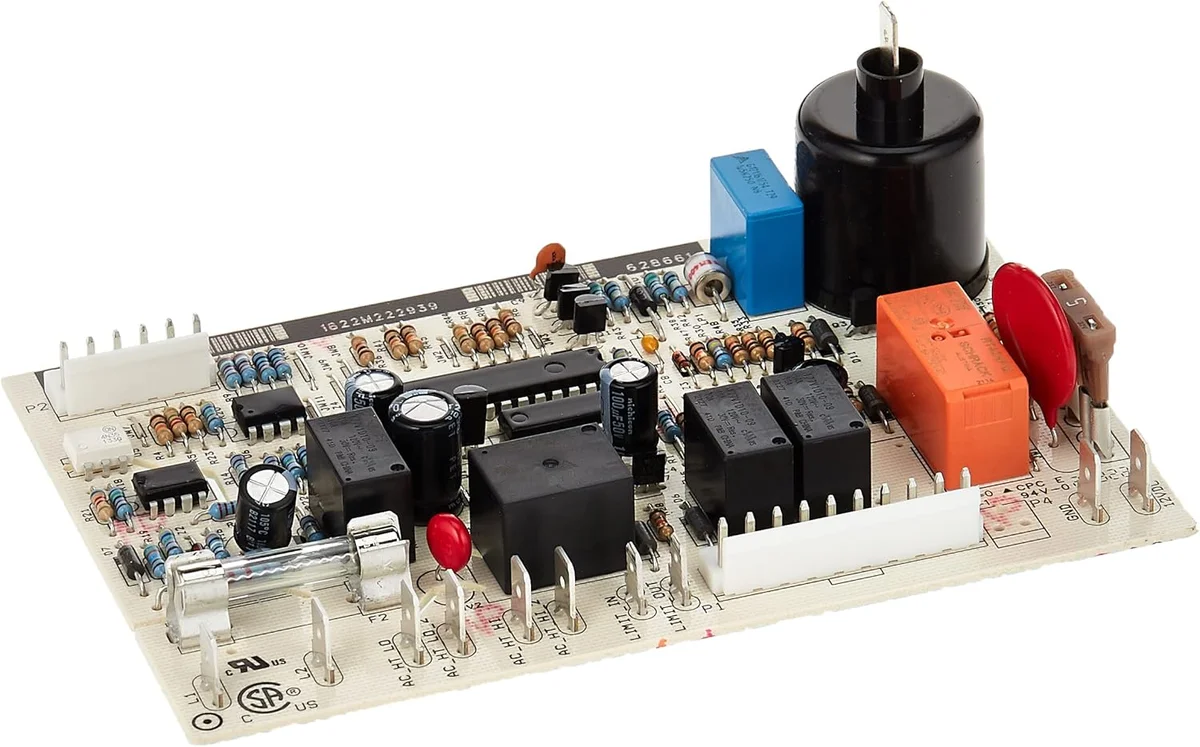
Step 1 — Confirm power and fault codes
Check the eyebrow display: no display at all points at 12V supply, fuses, or the power board. A displayed fault code (check your manual for the blink/code table) usually names the subsystem — thermistor, igniter, or communication errors each leave a signature.
Verify 12V DC at the board terminals with a multimeter and confirm the fridge is level within spec. Absorption fridges that run off-level overheat the boiler and mimic control failures. Also confirm the roof vent is clear — blocked ventilation produces the same warm-box symptom as a weak cooling unit.
- Battery voltage at the board: steady 12V+ DC, not sagging under load.
- Fuses and breakers for both AC and DC feeds, including the in-line fuse at the board.
- Fridge level within spec; vents and burner area free of nests and soot.
- Fault code recorded from the eyebrow display before resetting anything.
Step 2 — Board symptoms vs cooling-unit symptoms
Control board suspects: dead display, works on one heat source but not the other, erratic temperature swings, or a fridge that worked yesterday and is fully dark today. Common replacements include the Norcold 628661/639593 power boards and Dometic 3851331011-series boards.
Cooling-unit suspects: the boiler area runs hot but the box stays warm, a yellow powder residue or ammonia smell at the rear, or steady decline over weeks. No board fixes a breached sealed system — that needs a cooling-unit replacement.
Step 3 — Test before you order
Test the thermistor first: at room temperature it should read in spec per the manual table — a drifting thermistor makes a good board look faulty and is the cheapest part in the chain. Then check the heater element for continuity on the dead heat source, and confirm the board relay actually sends voltage when that source is selected.
If the board is the suspect, pull it and read the full MPN on the label — boards are revision-sensitive, so match the complete number (for example 628661 versus 639593), not just the fridge model. Photograph the label before you unplug anything; heat and age fade the print.
- Thermistor resistance at room temperature vs the manual table.
- Heater element continuity on the non-working heat source.
- Board relay output voltage when that source is selected.
- Full board MPN from the label, photographed before removal.
Gas and electric heat-source deep checks
On the propane side, confirm the bottle has flow (try the stove), the excess-flow valve has not tripped, and the burner tube is free of rust flakes and insect nests. A board that sends spark voltage but gets no flame is reporting a fuel or airflow problem, not an electronics failure — watch the burner through the sight glass during ignition and note whether spark, gas, or flame-sense is the missing step.
On the electric side, pull the heater leads and check element resistance against the manual spec — an open element reads infinite and explains a dead electric mode completely. Also check the AC fuse or breaker feeding the element and the board relay that switches it: voltage at the relay coil with no voltage at the element means the relay contacts have failed even though the board logic is fine.
- Propane: bottle flow, excess-flow valve reset, burner tube and orifice clear.
- Ignition sequence watched at the sight glass: spark present, gas present, flame sensed.
- Electric: element resistance vs spec, AC fuse/breaker, relay coil vs contact voltage.
- Flame-sense electrode cleaned and gapped per manual before condemning the board.
When to stop repairing and replace the fridge
Set a repair budget before ordering: if the cooling unit is breached on a fridge over 12–15 years old, price the sealed-system replacement plus new boards against a new fridge with a warranty. Cooling units run a large share of replacement cost, and an aging box with brittle door seals and a tired burner assembly will keep billing you after the big repair.
The math favors repair when the box is sound and the failure is electronics: a $150–$400 board in a 5-year-old fridge with good seals is an easy yes. It favors replacement when the failure is the sealed system in a fridge old enough that seals, hinges, and burner parts are all due — add those to the estimate honestly before deciding.
- Repair budget set before ordering; sealed-system cost priced against a new fridge.
- Door seals, hinges, and burner condition factored into old-fridge decisions.
- Repeat electronics failures traced to power supply before buying another board.
Step 4 — Read the data plate before ordering
The appliance model and serial live behind the lower crisper drawer or inside the burner-side access door. Boards are revision-sensitive: match the full MPN on your existing board, not just the fridge model, and photograph the label before you unplug anything.
Eyebrow and power boards are often matched sets — when one is replaced, confirm the revision compatibility line on the product page covers the other. Mixed revisions cause communication faults that look like a second failure. Orders placed before 2 PM ET ship the same business day, and freight over $300 ships free.
- Model + serial from the appliance data plate (behind crisper drawer or burner door).
- Full board MPN from the board label — 628661 vs 639593 are different revisions.
- Eyebrow board revision confirmed compatible with the power board revision.
- Label photographed before unplugging; connectors labeled with tape before removal.
Board swap procedure: 30 minutes without damage
Kill every power source before touching the board: unplug shore power, disconnect the house battery negative terminal, and close the propane bottle valve. Then verify zero volts at the board terminals with a meter — a live 12V feed during connector handling is how new boards die in the first minute.
Label every connector with masking tape before releasing its latch, and photograph the board from two angles so wire routing is unambiguous. Handle the new board by its edges, mount it on the original standoffs without overtightening, and reconnect one plug at a time until each latch clicks. Power up in stages — 12V DC first with a check that the eyebrow boots and shows no fault code, then AC, then gas — and confirm both heat sources cool before closing the access door.
- Shore, battery, and propane all off; zero volts verified at the board with a meter.
- Connectors labeled and photographed; new board handled by edges on original standoffs.
- Staged power-up: 12V boot check, then AC mode, then gas mode before closing up.
- Old board kept labeled for a week in case symptoms return and revisions must be compared.
Preventing the next board failure
Most repeat board failures are power problems, not bad luck. Campground pedestals spike — a surge suppressor on the shore feed pays for itself against one saved board. Chronic low voltage from a dying converter or sulfated battery browns out control logic until relays chatter and traces overheat, so load-test the house battery each spring and confirm converter output holds steady under load.
Moisture kills the rest: a warped exterior access door lets road spray onto the board, and condensation from blocked roof vents drips exactly where electronics live. Reseal the access gasket, keep the burner area clean and dry, and dab dielectric grease on multi-pin connectors in humid climates. Once a year, pull the board cover and look for green corrosion on terminals — five minutes with a brush prevents a mid-trip failure.
- Surge suppressor installed; battery and converter verified each spring.
- Access door gasket sound; burner area clean, dry, and vented.
- Annual terminal inspection — green corrosion cleaned before it spreads.